Fresh peapod

I’m in this annoying stage where I’ve knit more than enough things for myself (how many scarves/cowls does one need, really? Especially when winter is nearly over and yet hasn’t even arrived) so I constantly offer to make things for other people.  The knitting is still fresh enough for these people that they aren’t yet rolling their eyes and turning me down, or perhaps they are but we’re just chatting online so I’m not there to see it.  Either way, offer I do! And they accept often.

I’ve unknowingly slipped into the black hole of yarn, where the standard store stuff no longer suffices and I’m on the search for certain types of wools, blends, organic cotton and bamboos and thank god Mister went snowmobiling with my brother this weekend because I looked around at one point in horror and actually stopped my knitting to start PUTTING AWAY ALL THE THINGS because I still can’t accept that I’m going to let projects and stufffffff just pile up everywhere even though I know it’ll eventually happen because the house, it’s small and the projects, they are many.

Projects like these I cannot imagine ever selling, because the material costs alone are more than others seem to sell them for.  I still cannot understand how some price their items so low and I refuse to devalue my work and time, so I think I’ll just reserve these types of things for special people.  The materials they can cover, but the time is my gift.

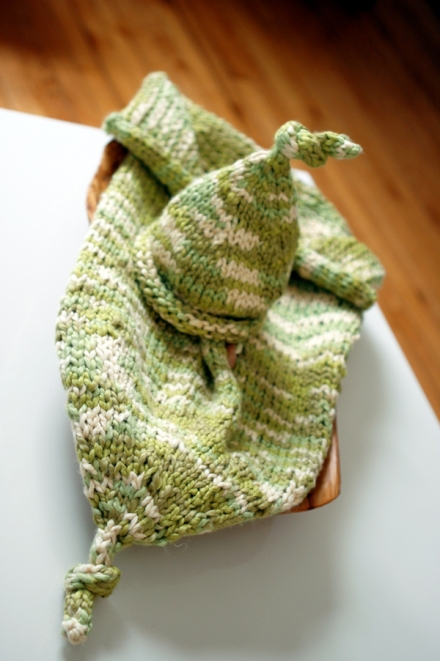
SO! I’ll keep this ambiguous because though I have no readers, the internet can often be a small place and I wouldn’t want to ruin any surprises.  A person that is not me is having a baby and though a friend of a friend, I’ve met her before and she’s lovely, so I immediately offered to make something for her upcoming shower.  The plan started as just a cocoon/photo prop which turned into a peapod and then there was nearly a full skein leftover so sure, what baby doesn’t need a monster too?

I started from this Peanut & Peapod pattern on Ravelry, but if we’re being honest, I found it quite frustrating.  It was a two-fold (perhaps more) issue.  First, the pattern was generally lacking in any detail.  Let’s be clear – by just looking at the pod I knew it was simple, but I read and reread and kept thinking ok, where are the rest of the instructions?  If anything, I’m upset at myself, not the pattern, because once I stepped back from the adorableness of a BABY in a PEAPOD, I know I could have just knit the entire thing without a pattern at all.  Sigh.

Next, she suggests holding the yarn double stranded and knitting on 13 circular needles.  Well I have 10 and I have 15 and I wasn’t going to buy new needles just for one project, so I found this gorgeous organic cotton and held it double stranded on the size 15 and it was coming together so well but I was absolutely tearing through the yarn – more than a skein gone and not even to the first button hole.  And we already discussed how the material costs aren’t small, so I just couldn’t justify the cost of six skeins, even if I’d been working on size 13 instead. I’d feel sick charging someone that much for just the yarn.  So I frogged the entire thing and started over with a single strand on the size 10, which knit together great but then none of the measurements were the same.  I finally came to the realization that this is so simple, why am I over thinking it?! So I threw the pattern aside, glancing only as a guide, not a pattern, and just put them together based on my own intuition, and I think that turned out for the best, really.

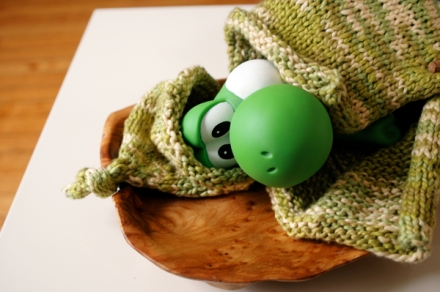
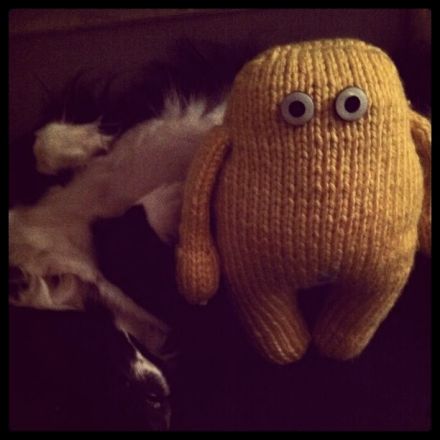
I don’t have a baby, so Yoshi will have to do

I used Lion Brand Nature’s Choice Organic Cotton in Limeade because it was the perfect peapod color and I wanted something that would be great for a baby.  I would have preferred a trip to my local shop (recently discovered, City Knits in Detroit!) but we were on an incredibly short deadline so I was happy to find a good yarn quickly.  The final pod is super soft and the yarn knit up quite easily on my size 10 bamboo needles.  The label suggests size 9, but I’m an extremely tight knitter (intentionally so) and I knew I wanted a floppy and soft final product, so I intentionally sized up.  If anything, my only complaint is that the nubby-ness in the yarn sometimes shows in photos as uneven stitches and then my OCD kicks in and I panic, thinking it looks like lousy knitting.  But really – breathe – its gorgeous in person and I’ll add all these notes to the Ravelry project in hopes of helping others out. The peapod and hat used just over two skeins, perhaps a bit more because I found a 3″ nasty hard section of yarn in one of my skeins and had to cut it out.  The rest went to the monster below and I’m left with so little it’s hardly worth saving.

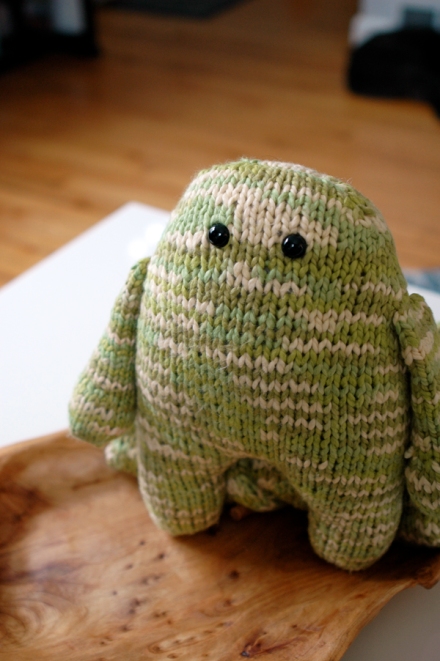
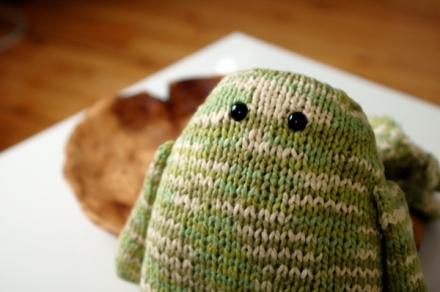
The monster, well we’ve been through this before.  It’s an adaptation of Rebecca Danger’s Maddox which I’ve linked to so often, I’m sure she’s beginning to think who is this weirdo and why does she keep talking about me?  I haven’t made a monster since the holidays, which seems like a lifetime ago, but really is only 6 weeks or so, and I’m amazed and how far I’ve come as a knitter.  This guy was a total breeze and I’m thrilled, because I may have finally come up with a monster that I feel comfortable selling through Milkshed.  He’s a great finished size and the organic cotton is perfect for babies.  I’ve tweaked the decrease on the head three times now and settled on the final steps that I prefer.

Thanks for the stand in modeling, Yoshi

Scenes from the weekend

Lately I feel like the weeks are just a rush to the next weekend, desperately counting down the hours until I get some free time to work on all things Milkshed and some access to daylight so I can actually start photographing products.  Really, once these photos are edited, the last step is to finalize shipping and guys, let me tell you, its the absolute hardest part of this whole thing.  I’m so stuck on the idea of people being able to open a package – carefully selected boxes with my stamp on the front, tidily folded tissue paper with an honest note of thanks, all wrapped up with this ribbon I’m so super excited for –  not just ripping the tape off an ugly shipping box to find a pod squashed among annoying packing peanuts. With that though comes a cost and at this point I can’t figure out how to make it all happen without absorbing some of the shipping cost myself within the product cost, because the idea of charging like $11 shipping makes my stomach turn.  I’ve read myself dizzy on Biz Ladies entries from Design Sponge and Etsy articles from their seller handbook, and, informative as they may be, it seems as though no one is ever really willing to talk real numbers, so I can’t find a better solution and I’m just going to give this a go the way I’ve planned and see how things turn out.

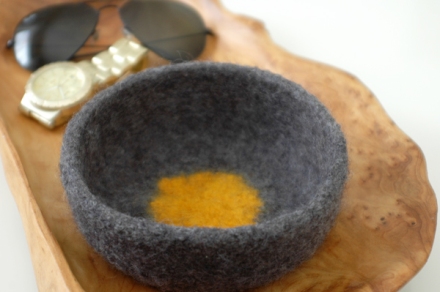
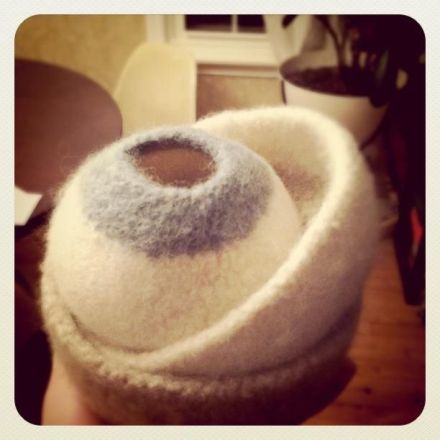
Mister and I don’t talk about knitting and Milkshed often because he likes me plenty, yes, but really, yarn doesn’t interest everyone the way it amuses me and talking small business to-dos can easily turn into me whining about my lack of time/money/energy/etc.  Over chinese last week we discussed some updates and I learned that he does actually see/know what I’m doing here (<3) but, ever the man of logic, questioned what you really do with a felt bowl.  And, my dear, an excellent question you have there.  Because there are people who buy things for function (him) and people who buy things that are pretty (me) so while I was taking product photos I thought I’d actually show you what I do with these here bowls because the prototypes I’ve kept for myself; I cannot bear to sell them.


Primarily, the storage of all things girly

Secondary, a key bowl

My first two bowls set out into the world themselves last week when I left a set at the farm for my mom to donate to an upcoming charity auction.  It’s an odd thing to spend so much time and effort creating something then handing it over to someone else.  Until now, no one owns Milkshed bowls but me.  Now they’re out there for others to see… critique…. hopefully love.  I find myself curious where they’ll end up and hope they generate at least some money in the auction.

The weekend was fairly lazy, as they tend to be around these parts.  We babysat my little niece nugget Saturday evening.  Mister amused her by LEAPING from the coffee table onto the couch and we hosted a Beastie Boys dance par-tay, so I can only hope once she’s old enough to know our names she remembers us as the cool ones.  Among adults? Toootally uncool.  To a 14 month old though? Yeah, we know what’s up.  Everytime we babysit her I come home thinking we’re totally ready for kids, have dreams about having kids, then wake up the next morning all excited about the concept of having kids until I realize we just woke up past noon… and yeah that so isn’t happening with kids around so let’s just keep things the way they are, shall we?

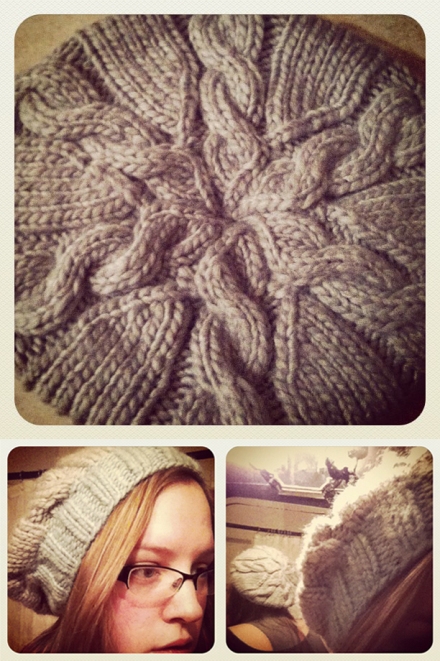
Even though half finish projects litter the house I thought I’d dive into something new on Sunday and found this Quick Cable Slouch Hat pattern on Ravelry.  The pattern was so simple and came together in just a few hours and I’ve been wearing the hat, oh, pretty much non stop ever since.  I’ve already had multiple requests to purchase ones as well, but I’m respecting the authors instruction and not putting any up for sale.  I’ll either create a few as gifts or just write a new pattern for a different hat… we’ll see what free time allows.

Scenes from the weekend

We spent the weekend at the farm – Mister busy with military duty and me busy with the miscellany you see below

My parents were at the cabin, so I checked in on the sheep.  Fatty ding dongs there in the center (not her given name) was very vocal in her desire for fresh hay.  Also, in case you weren’t previously aware, sheep are adorable when they chew.  And the picture is to show how BAD those boots are, not how cool they are. Just so we’re clear.

Cooper & Emma were splendid company until Mister came home, then they gave him all their love. Because they like him more than me.

I drank a lot of coffee and taught myself how to do cables – a bit poorly at first, take note.  This project deserves far more attention though, which I’m sure it will get in the coming week.  For now, know that I went online (which surely couldn’t have been better than dialup given hoooow loooong it tooook to getttt annyyywhere) and ordered 8 (eight) more skeins of this stuff that evening because its just that good.

MOST IMPORTANTLY! While we were gone, my custom stamp order arrived.  I’m ex-cited, with an emphasis on the EXCITED part.

Of Monsters (& Men)

I never intended for this to be a blog of *just* knitting, so first, I have some music to share with you.  If you’ve already heard them, consider yourself blessed.  If you haven’t yet, I’d like to encourage you to check out Of Monsters & Men.

From Wikipedia  – Of Monsters and Men are a six piece indie/folk band from Iceland… are the 2010 winners of Músíktilraunir (a nation wide battle of the bands competition).

I first heard their single Little Talks on Siruis Alt Nation a few weeks ago and the first few notes alone blew my fragile little mind.  I’ve since been listening to them essentially on repeat.  I dug around online for some info at the time, but found nothing beyond a few YouTube videos and reference to Little Talks.  WELL MY FRIENDS, you are in luck! Inspired by this post, I decided to look them up again and see that their EP Into the Woods was released on iTunes in late December.  I’ve already downloaded it and think you should do so as well, if it’s your thing.

For now, enjoy along with me:


Despite my insistence that I’m not just all about knitting, I am kind of all about knitting right now, so I also want to share some old projects.  I pretty much got into knitting to be able to make stuffed monsters.  My best lady friend decorated her baby girl’s nursery with Uglydolls and we frequently discussed hosting a monster birthday party, so I figured it was time to learn.  This yellow guy was literally my fourth knitting project ever, so don’t be intimidated.  Details, later.  For now, just pictures.

Working from the legs up to the head.  Its like a pair o knit pants!

I followed patterns from Rebecca Danger, and they’re super easy to follow even if you haven’t knit in the round before. In fact, it’s how I learned how to knit in the round.  That’s an iPad underneath for size comparison.  HE’S HUGE!

Still eyeless, but almost complete. 

I’ve since made a few more stuffed things and I’m absolutely positively loyal to Lion Brand Hometown USA yarn for any stuffed toys.  When knit with size 10 needles, you get a nice tight stitch that doesn’t allow any stuffing to show through.  It’s super easy to work with, creates a great soft huggable product when complete, and is washable.  It also comes in a huge range of bright colors, great for any stuffed toys.

Hanging out with Cooper, for size comparison

I enjoyed knitting from the beginning but working up these monsters is what absolutely sold me on being a Knitter.  I’m so torn on my decision to not sell them through Milkshed though.  The short explanation – if you stumble across this and desperately want a monster, I’d be thrilled to make one for you, but it’s not something I’m planning to regularly offer.  The material costs and time sink are not insignificant.  I made a few for the holidays and was proud to give them to their new little owners, but I much prefer to spend the bulk of my time refining my bowls and pods.  If you’re interested, email me though.  We can chat.

I’ll definitely talk in more detail about the process of making monsters/stuffed toys when we get to Toolshed #4: Knitting in the Round.  You can also check out my Ravelry Page for more details on the modifications I made to Rebecca Danger’s already awesome pattern.

Finally, (Not so F)AQ should be up soon, I think.

Toolshed: Part 2 – Onto the knitting; a scarf is in your future

First, a quick recap: This Toolshed series is intended to serve as a basic introduction to knitting.  As I said before, there are plenty of great resources, links, and videos showing you how to do individual stitches or steps.  What I never found though, was a complete step by step, start to finish list of THINGS I NEED TO KNOW.  It’s tough to look for a link showing how to Cast-on when you don’t even know what casting on means.  My goal is to share the (great!) resources I found and point out the mistakes I made.

In Toolshed Part 1, we did a quick & dirty review of important terms, yarn types & sizes and how to select your needle type & size. Toolshed Part 2 hopefully gets you actually knitting!

I hope it goes without saying, but just in case – I’m not making videos of the entire process because I honestly don’t think we need yet another video showing the same thing.  If you’ve stumbled here and have questions though, I’m always available to answer them.  I taught myself to knit and I’m positive you can teach yourself.  If you need help along the way, just ask!

Onto the things that involve knitting…

I learned to knit by buying some yarn and needles, sitting down with them, iPad in my lap, and pretty much just assuming that it was easy and I could already do it.  The basics are easy.  Knitting something really really well takes plenty of effort and practice.  Just knitting though… so simple.  KnittingHelp.com is where I learned the basics and has the absolute best, clearest, all around awesome videos.

These are literally the bullet points I followed.  Watch with your yarn and needles in hand, pausing & rewinding often.

  • Take the label off your yarn and roll into a ball.
  • Decide if you’re going to knit Continental or English. Scroll down to the “Wait, Continental or English” section of this page. I picked continental because it’s what she uses in the first video and I didn’t see a reason to confuse myself further.  Apparently, most knitters are English.  Oops.  Everything I show in pictures will be done Continental.
  • Watch Long Tail Cast-on (there are other methods to cast on, but this is how I always start)
  • Watch The Knit Stitch
  • Watch Orientation for Beginning Knitting, which is a demo of a small project and shows you how to put everything together.

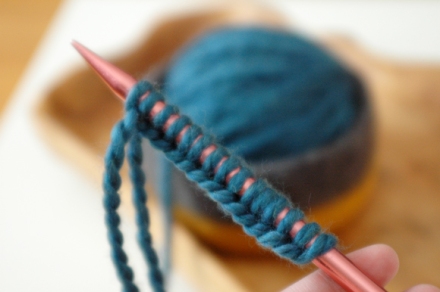
casting on

Watch & rewatch those, following along with your yarn, pulling out the first lousy attempts.  You will have some lousy attempts. I had many.  Later maybe we’ll talk about my trapezoidal scarf that I thought I was doing perfectly.  I even bragged on Facebook about it, before realizing that I had so little understanding of what I was doing, I didn’t even know it was wrong, which, incidentally, is sort of like my time in any Physics class.

Once you have a perfect Cast on, knit knit knit knit knit.  All knit stitches on straight needles is called garter stitch. Count your stitches for the first few rows, because you’ll probably mess up.

THIS IS WHERE I SHARE THE THING THAT I MESSED UP ON A MILLION TIMES AND DIDN’T EVEN REALIZE

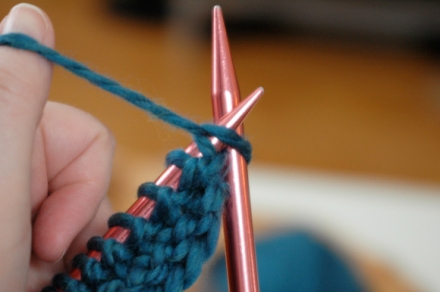
When you flip your scarf to start your next row, you may see what looks like 2 stitches (above).  This is still one stitch, your yarn is just in the wrong starting position.

If you knit both of these (don’t knit as shown above!), you’ll end up with an extra stitch in your row.  Do this enough times, and you’ll be increasing your stitches each row until you have a very confusing, very ugly trapezoid (a ha! there was my mistake)

Instead, move the yarn behind, so you’re only knitting one stitch, then continue.  Always watch for this on the start of a row.

continue knitting as usual

Knit knit knit knit until you’re almost done with the first skein, then join a second by just lining up the tails.  See here, the section called Joining Yarn for a picture.  Knit knit knit the second skein of yarn until the scarf is at a length you like, then watch Binding off.

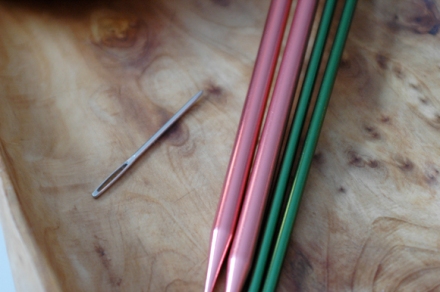
A needle with large eye is invaluable for weaving in tails.  I found mine in the knitting section, not with the sewing stuff.  Re-watch the demo of a small project to see how to weave in your ends.

You now have a scarf. And it’s amazing, I’m sure.  Seriously, even if it kind of really sucks in reality, you just crafted something from nothing.  THAT IS AMAZING.  I was straight up beaming proud of myself and you should be too.  When the Zombie apocalypse comes, you will be equipped to clothe people during winter months.  This is legit Laura Ingalls Wilder type stuff and even if your Mister insists that it’s not a necessary life skill and sort of rolls his eyes, know that you’re awesome and now have at least one solid survival skill that he doesn’t, so when he’s out cardio-ing you away from the Zombies, he’ll still have to save your ass so he doesn’t freeze during the long winter months.

Next time, button holes, ribbing, and cowls, oh my!

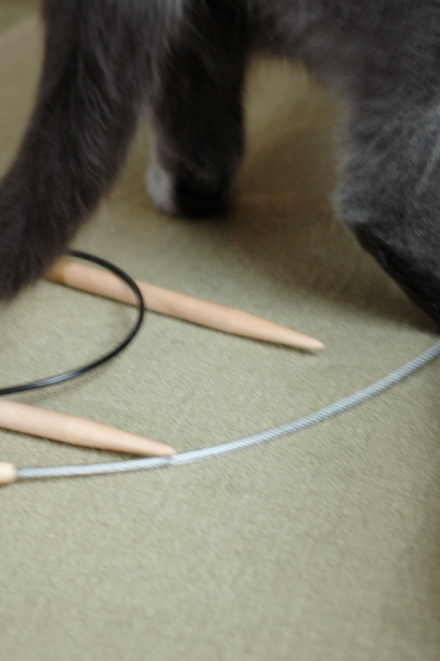
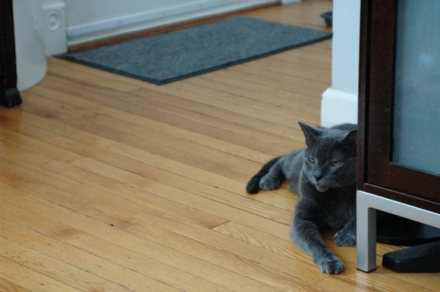
If you have a cat, he will get in the way. Fact.

Toolshed

Part 1 I Part 2 I Part 3 I Part 4

Toolshed Part 1 – The most basic info

When I tried to learn to knit, I noticed the same basic terms popping up, but I couldn’t find anyone who explained how it all goes together.  If anything, there’s TOO much information out there.  As I said before, there are plenty of tutorials explaining how to knit a stitch or bind off a scarf, but I couldn’t find anyone who laid out the exact steps, in their correct order, that I needed to take.

Questions I actually asked myself:

What do I do with this thing of yarn… does it need to be in a ball?

How do I.. get.. the yarn… onto a needle?

Awesome, I just cast on this bitchin’ row of 22 stitches… now what?

Ok, the first row is done… um.. how do I keep going?

In order to knit, you will need to learn to understand yarn weight and needle sizes & types.

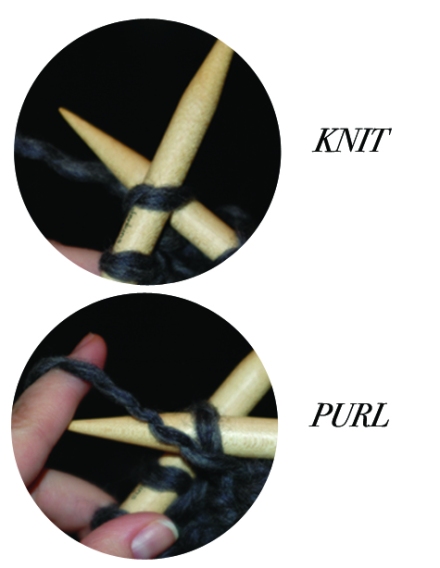
You will learn to cast on (get the yarn on the needle), then you will knit or purl (2 types of stitches – that’s it), following your pattern until you eventually bind off (create a finished edge and stop).

If you want to make something beyond a scarf, you may also learn how to knit in the round.  This can be done on double pointed needles or a circular needle.

Needles & yarns – super quick tips

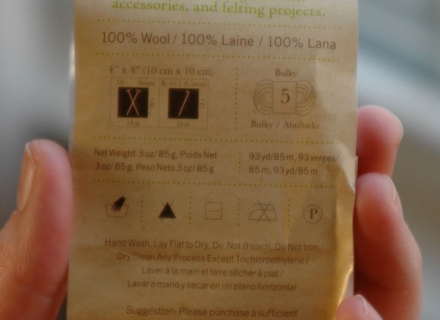
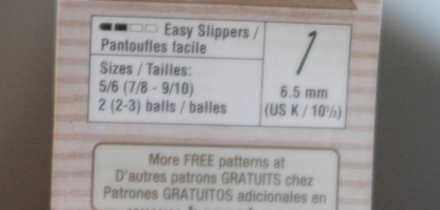
Pick out a yarn you like, look at the label.  There is a suggested needle size listed.  Go get that size needle.  It’s that simple!

Above, Bulky yarn (explained later), size 10 needles (listed in black box)

This is not comprehensive (which could be overwhelming) it’s just a super quick overview — Yarns come in weights from Lace up to Super Bulky. You’ll see/hear Laceweight, Fingering, Light Worsted, Worsted, Bulky, Super Bulky – these just indicate size of the yarn.  Needle size is determined by yarn size.  They can go from tiny little 2 up through very large 19 or more.  It can get detailed and include .5 sizes too – ignore it for now. I do.

For a more detailed approach, think about the knit products you buy.  When I used to buy knit things, I only bought super chunky scarves, cowls, gloves, etc.  So I started with a Super Bulky yarn from JoAnns (Lion Brand Wool Ease Thick & Quick is a great option), and size 13 needles.  Get 2 skeins.  It’ll make for a nice big scarf and give you extra to mess up.

For needles, I started with a pair of single point Aluminum needles (above, in pink & green) because, well, they looked nicer so I assumed they were better.  Now I use wood needles almost exclusively.  It’s a personal choice.  The yarn slips along aluminum easily, so it can be easier for beginners. The yarn also slips OFF aluminum easily, so you can easily drop stitches.  It’s difficult to figure out how to pick up a dropped stitch when you aren’t even yet sure what you’re looking at.  I’d tell you to buy wood.  I have a bunch of Clover brand bamboo needles from JoAnns and they’ve been great.

17, 15, 13, 10, 9, 6

Those are general rules, but it’s not a science.  I own 9 & 13 single pointed needles, 6 & 10 double pointed needes, and 6, 10, 15, 17 circular needles.  If I’m knitting something stuffed, I go 2-3 sizes smaller (I almost exclusively use a super bulky, suggested needle size 13, but actually knit on my 10 double pointed needles and 10 circular) to create a really tight knit that hides stuffing.  I learned this trick from Rebecca Danger and she’s awesome, so if you won’t listen to me, listen to her.  If I find a great wool that’s a bit “rough” to the touch, I’ll knit up maybe just one size to create a softer more open knit product.  If you LOVE a yarn and but can’t find the “right” needle, know its just a suggestion, and get something that’s close or use a needle you already have.  Even if this theory is technically wrong, it works great for me.

Now you hopefully won’t spend a month wondering what “worsted” means.  Plus, surely you’ve bought 2 skeins of yarn and needles, so now you need to actually learn to knit.  Onto part 2!

Toolshed

Part 1 I Part 2 I Part 3 I Part 4

Scenes from the weekend

Mister is spending the weekend with my brother and sister-in-law, chasing snow throughout northern Michigan.  Some are thrilled by this unusually warm winter we’ve had, but for a snow/snowmobile loving family, it’s quite upsetting.

stolen from his facebook

At home, we’re settling into a lazy day of Prison Break season 4, cleaning, knitting, hanging out with the pets, and other incredibly dull, but awesome-to-me things.

Cooper, ever the ham, always comes around for photos.

There’s a vent on this wall and the spot has Baxter’s name on it all winter long.

Meanwhile, Emma is terrified of the camera. I found her in the corner, facing the wall, absolutely refusing to look at me.

Cooper is cute, sure, but the real reason I had the camera out was to play around, hoping to learn some new settings.  I’ve had a Nikon D70 for years but I, quite embarrassingly, have almost no idea how to use it.  Planning to change that soon, though.  Over an Indian food lunch date today, a friend and I discussed taking photography classes soon.  We’re pretty pumped, provided we can find an upcoming weekend class.  While I have this daylight, too, I’ll take some final photos for the upcoming Toolshed series.  Let’s hope my photography skills improve alongside your knitting skills!

Most importantly, there’s no backing out now – Milkshed supplies arrived, so it’s time to start working on some great new inventory.  I’m giddy.

Opening the Toolshed

Ahhhh puns are funny.  Not really though.  The point here is, I want to introduce a quick series of posts that explain knitting in an approachable way.  We’ll call it Toolshed.  It’s a Milkshed Toolbox, of sorts.  There are countless websites out there to teach the basics of knitting, so I have no plans to repeat them. What I would like to do though is fill in some of the blanks that I found while I was learning early on, share some great resources, distill alllll that info down to WHAT YOU REALLY NEED TO KNOW, and point out the progression I took to quickly grasp knitting basics. Let me be clear – I’m no knitting pro. There are plenty of things I haven’t tried and I’m sure there are plenty I wouldn’t understand. Instead, we’ll say that I’m a pro at what I’m a pro at (there’s a rough phrase for you.) In other words, what I do, I think I do well. And I want to teach pretty much any/everyone how to knit, so I’ll use the Toolshed to share some tips and explain the things I do understand.

For now, I envision Toolshed as a 4ish part series.  They’re all in draft form already, because I can’t force myself to sit down and write something, it just comes when it comes and all I can do is quickly rush to the computer and try to document everything before it flutters away.  I’m hoping to grab accompanying photos over the weekend so there’s actually some PROPER LIGHT, not just the dark stuff that you’ve seen so far.

What you can expect!

Toolshed Part 1 – The Basics (terms, yarn, needles, and more)
Toolshed Part 2 – Beginning Knitting (and zombies)
Toolshed Part 3 – (Not so) Advanced next steps (for upscale scarfness)
Toolshed Part 4 – Knitting in the round (my most favorite)
Toolshed TBD? – Felting and behind the scenes Milkshed info

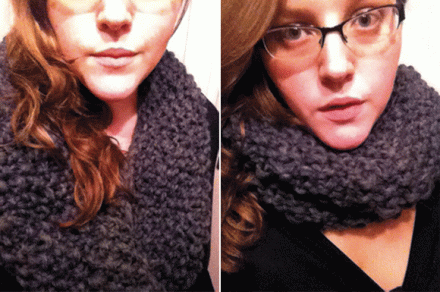
Unrelated entirely, I had a request for better photos of the final cowl.  I don’t have a tripod or nikon remote and get home after dark, so iPhone bathroommyspaceangle photos will have to suffice for now.  Also, note to self – get dress form so I don’t have to be in any further photos.

Projects, lately

For the first time in a looong time I completed a project just for me.

Super bulky yarn is tough to find.  Great super bulky yarn is incredibly tough to find.  Harder still, huge needles. It’s been nearly impossible to locate size 17+ needles on various cable lengths outside of a specialty shop, and I’ve yet to locate a great local one of those.  My mom is a fellow knitter (along with quilter, cross stitcher, sewer, and more) and, as always, came through with these absolutely awesome materials for me.

The yarn was a Christmas gift but I’ve been sitting on it for a bit though while trying to locate needles.  I’m partial to wood and I couldn’t find anything longer than 32″ without going specialty or online, so the yarn has been safely tucked away until I had the perfect set.

She picked up these Jenkins made needles for me and they’re just so so good.  I chatted with her while she browsed through the store and texted over a recent bowl pic which arrived while she was in line to check out.  She tells me the ladies had lovely things to say about the bowl, which just pumps me up even further for Milkshed happenings! Thanks for your support, kind strangers.

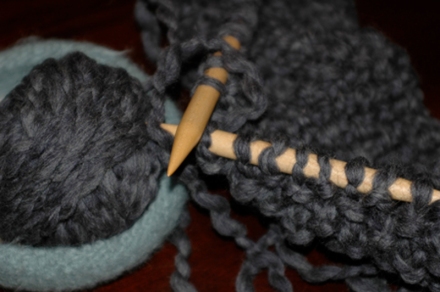
You can see that the yarn already has this fantastic variation to it, so I knew I wanted to stick with something that would have a lot of texture.  The seed stitch is absurdly simple and one of the first I learned, but I’ve always been drawn to the little nubs and dense fabric it creates.

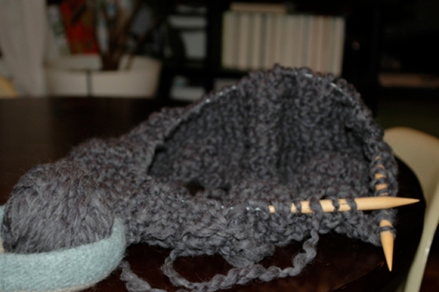
When doing seed stitch in the round, just remember to cast on an odd number of stitches.  From there, join and make sure to not twist your stitches, then knit one, purl one until you’ve reached the desired length.  You can certainly place a marker, but I rarely use them.

There’s no real counting beyond ensuring that you’re always knitting a purl and purling a knit.  If you accidentally drop or combine a stitch, everything can shift one and you’ll be creating a 1×1 ribbed cowl instead.  If you keep a casual eye on your stitches, it’s easy to blow through a seed stitch cowl in one evening or so, especially when working with materials this oversized.

The final cowl is just what I’d hoped for – the perfect size for single or double wrap, and large enough to serve as an emergency hood.

In the pictures above you can also see a Milkshed tray holding the yarn.  I’ve been experimenting with patterns for a “tray” version of both the medium and large bowl.  The same size, but with shorter walls, I use them for corralling jewelry on a dresser or change on my desk.  One always lives on a table by the couch to keep a yarn ball away from kitty paws and hold a rogue needle or two.  The walls here need some adjustment, but a final version should be up in the store with everything else soon.

On a final Milkshed note, I took the ultimate leap and placed a large(ish) supply order.  I’m sure I’ll eventually make products to order, but for now I want to have a small inventory on hand to get things out to people as quickly as possible.  I’ve slowly been trickling out photos to friends and family, taking care to walk the line between sharing what I’ve got going on and just plain annoying them.  I’m hesitant to spam my facebook or twitter buddies, but so far the response has been nothing but lovely.  For anyone following me on instagram, yeah I can’t even pretend to not be bombarding you. I post knit shit ALL THE TIME.